
There seems to be several ways of repairing the common problem of a stripped bottom bracket thread and I offer only one method I have so far used.
There are several other methods I am aware of and these are as follows:
1. Use a threadless bottom bracket instead of a threaded one. These repair bottom brackets are available, though I have only seen them for standard British 68 mm width bracket shells. No repair is necessary. There seem to be several manufacturers but all I have seen offer only a square taper design with a JIS taper. For aluminium frames this may be the only option. With the plethora of bottom bracket standards now available, more styles and sizes may become available.
2. Replace the Bottom Bracket completely. This is obviously quite a lot of work and expensive, though undoubtedly the most reliable long term solution. However it is feasible only for lugged bottom brackets. It may be the only option offered by traditional framebuilders.
3. One easier method is to slightly reduce the diameter of the bottom bracket by cutting a slot right across the length of the bottom bracket shell, I believe a hacksaw would suffice. You can then compress the shell and braze it back together, following which you can re-cut the thread, which should roughly follow the original thread.
4. I have seen in the past a recommendation to fit an Italian specification bottom bracket, which has slightly wider diameter cups. This would involve reaming out the bottom bracket then re-cutting the thread to the Italian specification. Reamers are expensive, adjustable hand reamers usually being the most economical to purchase. Additionally you would need the Italian thread cutters (both of which I understand are right handed threads) adding to the expense. For me this would be a non-starter. However in it’s favour is it is the only repair method not requiring a re-paint.
The method I have used, which worryingly I have not come across anywhere else, is to fill the bottom bracket threads with brass braze then re-cut them. I first did this on a brand new bracket that I had fitted the wrong way round and refer to it in the Mea Culpa section of this website.
The photographs below are for an older touring bike that had a stripped thread on one side, previously secured with epoxy glue. It is vital that the existing threads, such as they are, are thoroughly cleaned. I would usually use degreaser followed by every solvent I had to hand in sequence! Also a wire brush attachment on a rotary tool is helpful. Probably the best metal cleaner is dilute hydrochloric acid, which is contained in toilet bowl cleaner and can be used instead. It is also helpful to strip back some of the paint on the outside to stop it burning and giving off unpleasant fumes whilst brazing.


The technique used is quite simple and involves heating the bracket with a large flame then rotating the frame in a stand adding bronze to the dependant portion whilst maintaining the heat to the other side of the shell . I found it possible to do this without melting the brass holding the other tubes in place, though if the frame happens to have been silver soldered this may cause problems and require addition of further silver solder after the fact. Below you can see I pretty much managed to fill the whole area satisfactorily. I would add that although I was using a gas fluxer you need to paste flux up the inside first as you mainly use the torch externally. I use Sif No 2 bronze brazing rods for this (1.6 mm) rather than the usual Sif 101. Sif No 2 is undoubtedly a harder material and is said by the manufacturers to be suitable for building up gear teeth. It does however need a higher temperature to flow.
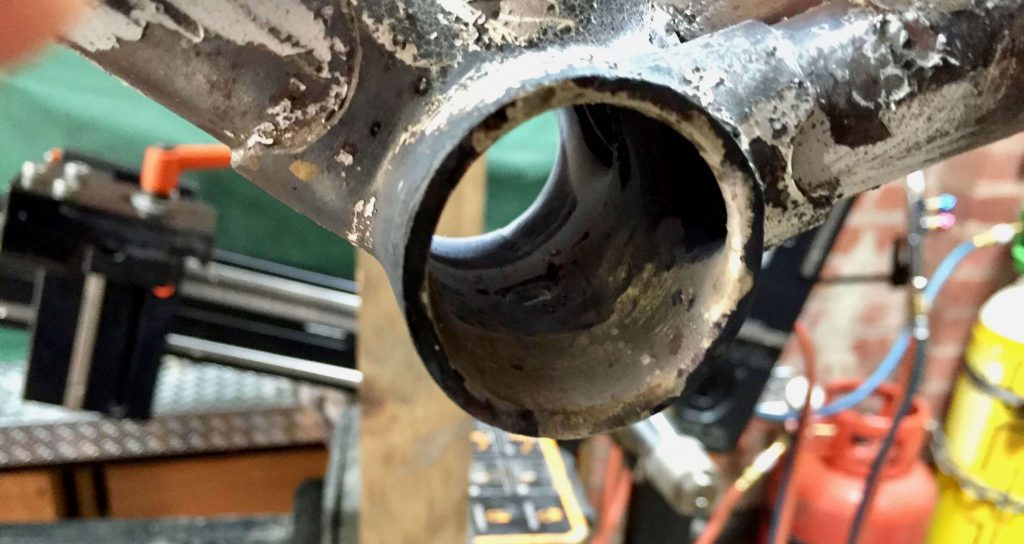
My picture library has again let me down as I cannot locate a photograph of the re-cut thread! This frame was scheduled for a respray before the repair.